

In today's era of advanced technology, effective communication with your audience is crucial. Email newsletters are a powerful tool for engaging a lot of visitors to your website. To send email newsletters thousands of people are using many mail-sending services like Mailgun, Mailchimp, Sendblue, Sendgrid Convertkit, and many others. Today I will going to taking about just Mailgun.
If you are using Ghost Pro hosting service then Mailgun is configured by default but if you use the Self Hosted version of Ghost on DigitalOcian or other hosting platforms and want to use Mailgun service then you need to set up manually with your Ghost website.
In this blog post, I will show you how to create a Mailgun account, navigate domain authentication, and seamlessly integrate it into your Ghost setup.
Overview of content, In this blog you will learn
- What is Milgun?
- How to create Mailgun Account?
- How to Verify Maiilgun Domain?
- How to Configure Mailgun with ghost?
- Some Tips for Crafting Engaging Newsletters
- Conclusion
- FAQs
What is Mailgun?
Mailgun is a cloud-based email automation service that can help you send, receive, and track emails more reliably and efficiently. Mailgun is not a free service if you using Mailgun then you can check the Mailgun pricing.
Create and Setting Up Your Mailgun Account
To set up Mailgun with Ghost Follow the Steps Below:
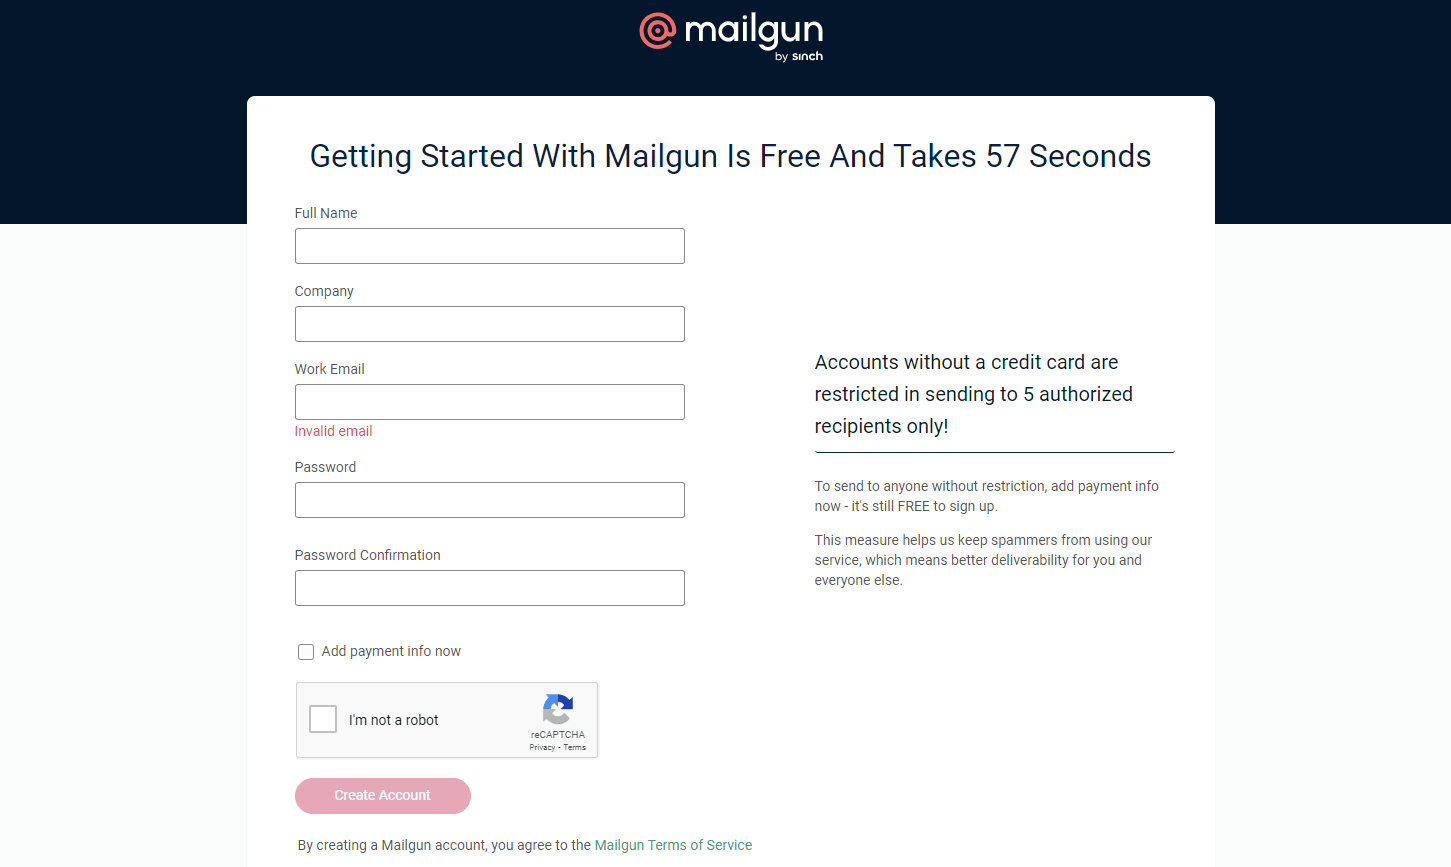
Step 1: Create a Mailgun Account
Go to the Mailgun website and create an account. Provide essential information and verify your email address.
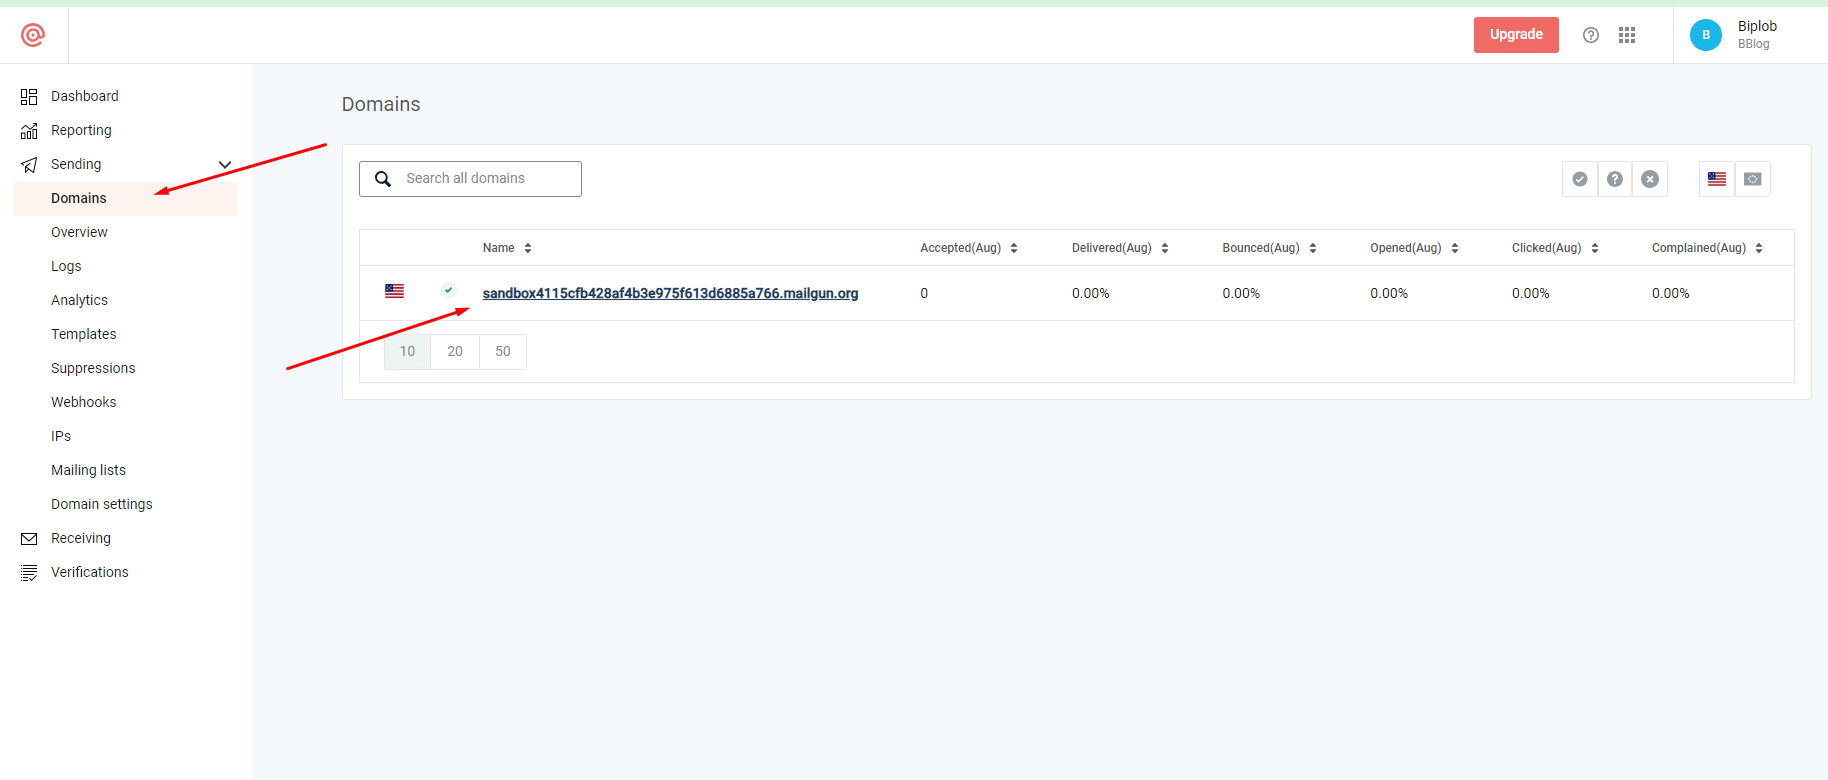
Step 2: Add Sending Domain to your Mailgun account
After creating an account, add a domain and verify it. This step ensures your emails have a professional touch and a higher chance of landing in your recipients' inboxes.
Step 3: Configure your DNS records to verify that you are authorized for the domain
Create new DNS records on your DNS provider dashboard. This step is crucial for authenticating your domain and boosting email deliverability.
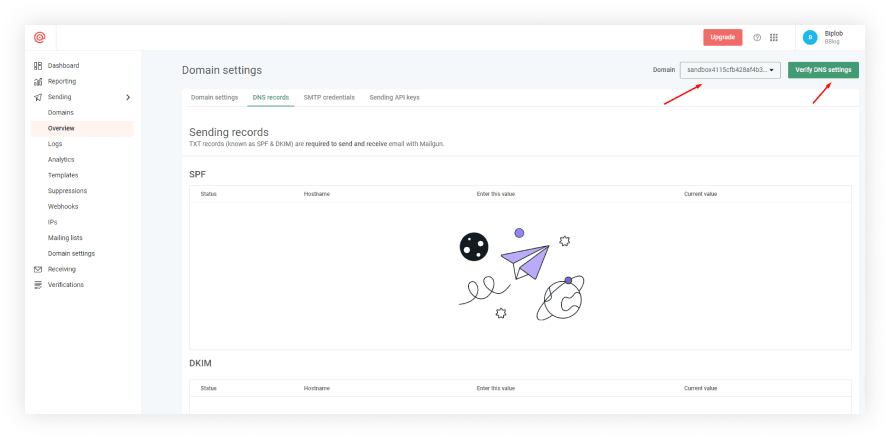
Step 4: Verify your mailgun domain
Now you should verify your Mailgun domain.
- From mailgun control panel click on the Sending optionto expand its list of suboptions.
- Click the Domain settings suboption, and on the resulting page, click the DNS records tab.
- Ensure the domain are displayed on the Domain drop-down list towards the upper-right side of the page, that you want to perform manual DNS verification. Now click on the Verify DNS settings button.
It may take some time for the DNS changes to propagate, so it is important to be patient
Ghost config
The next step is to update the production configuration of the Ghost instance on the server. Open the config.production.json file in your Ghost root directory.
In this file, there is a section responsible for mail.
"mail": {
  "transport": "SMTP",
  "options": {
    "service": "Mailgun",
    "host": "smtp.eu.mailgun.org",
    "port": "587",
    "secure": true,
    "auth": {
      "user": "admin@yourdomain.com",
      "pass": "xxxxxxxxxxxxxxxxx"
    }
  }
}
service- defines which mail service we use, in this case, MailgunhostandportThese two properties can be found by going to Domain Settings and then SMTP credentialshost- depends on the region, in our casesmtp.eu.mailgun.orgport- Mailgun servers usually listen on several ports (ex. 25, 587, and 465)secure- If want to force a secure SMTP connection
After adding all the settings and saving the config file, restart Ghost:
ghost restart
Test Config
To test the configuration log in to the Ghost Admin Interface
- Go to Labs and at the bottom of the page under Test email configuration click
Send. - You can check your email, you should have received the test email.
Integrating Mailgun with Ghost CMS
If you are using the Members feature, to send emails to people who subscribed to your publication, you have to do some additional setup within Ghost Admin:
Log in to your Ghost CMS admin panel and click on the settings icon
- Go to the Email newsletter then Mailgun configuration
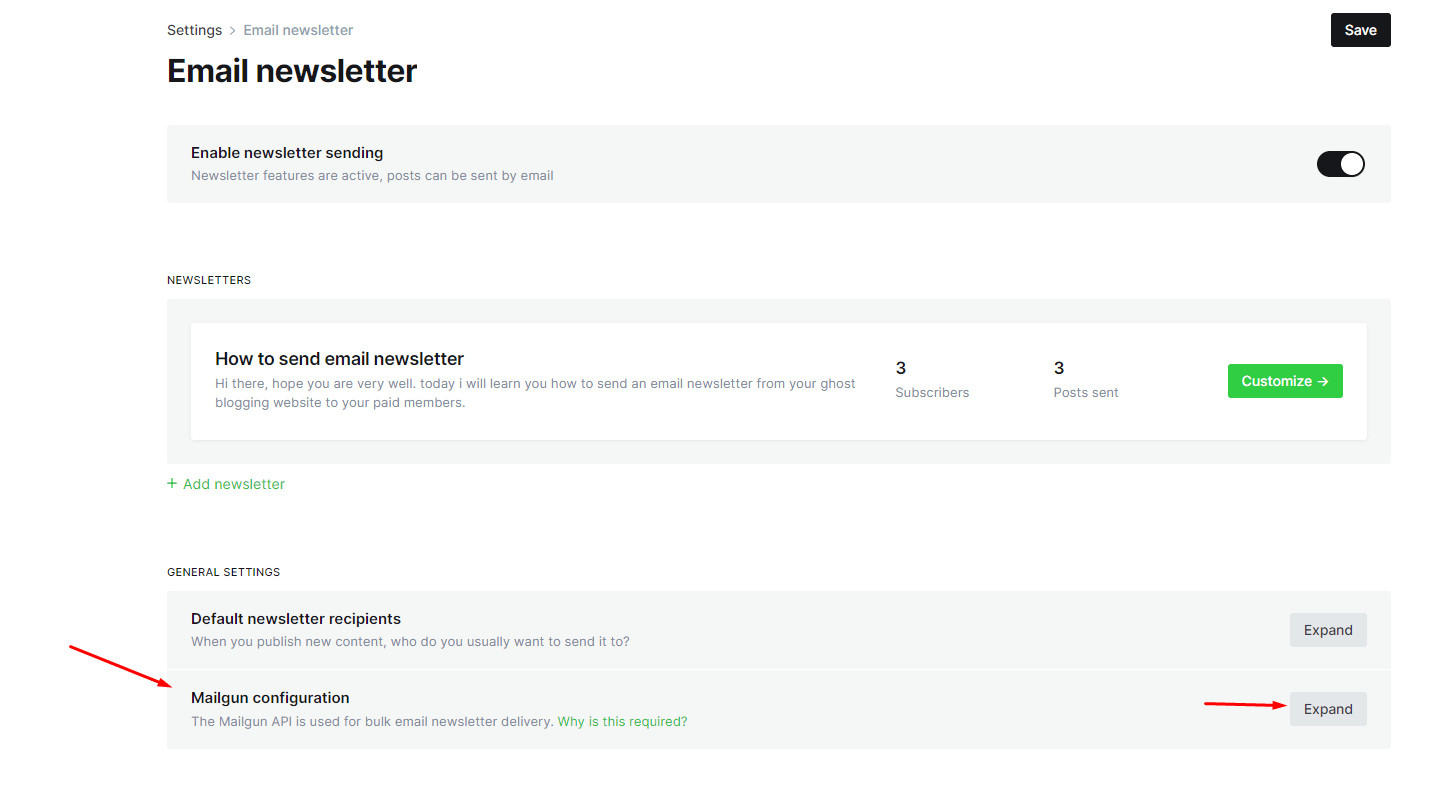
2. Click on the Expand button in the Mailgun configuration.
3. Fill in the From Information, Members will receive emails from this address
4. Select the Mailgun region and enter the Mailgun domain, from your Mailgun account that was created.
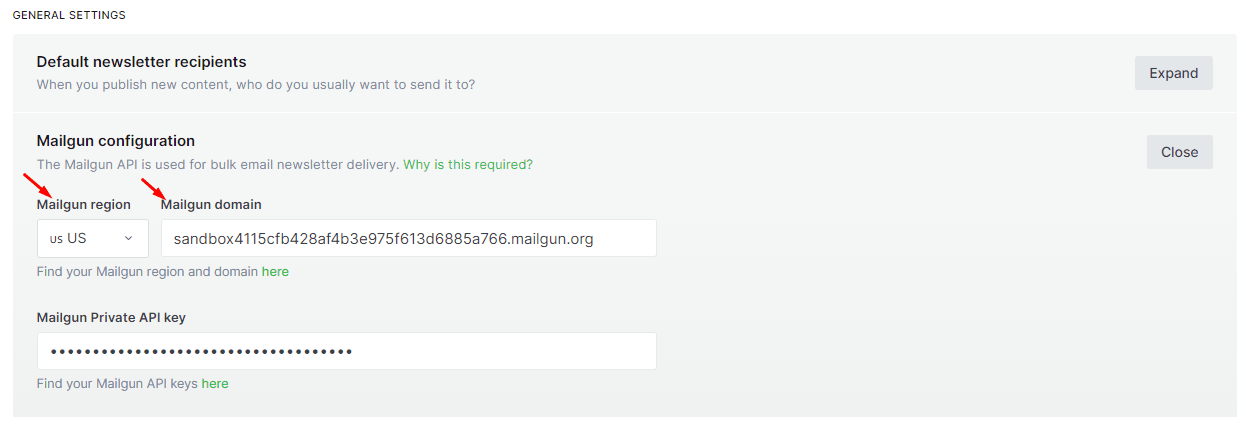
5. Input the Mailgun API key and domain you set up earlier in your Mailgun account.
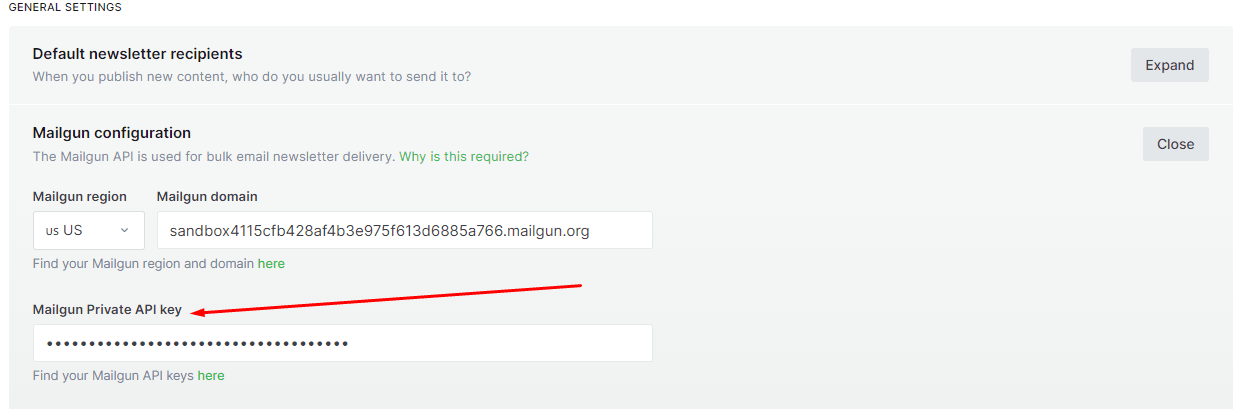
6. To get the Mailgun API Key, in your Mailgun Dashboard go to Settings then API Keys and copy the Private API Key.
Tips for Crafting Engaging Newsletters:
- Define Your Goal: Clarify the purpose of your newsletter – whether it's delivering updates, sharing insights, or promoting products.
- Structure Content: Organize your content logically with compelling headings, succinct paragraphs, and relevant images.
- Design Responsively: Ensure your newsletter is mobile-friendly and visually appealing. Use Mailgun's template editor to create a branded look.
- Personalize: Address recipients by name and segment your list for tailored content.
- Call to Action (CTA): Include clear CTAs guiding readers to take desired actions, such as visiting your website or making a purchase.
Conclusion
In Conclusion, by simply integrating Mailgun with Ghost CMS you can create and deliver impactful email newsletters. By following these steps, you'll bolster your email deliverability, engagement rates, and overall digital presence. Stay connected with your audience like never before, nurturing lasting relationships in the ever-evolving landscape of online communication.
FAQs
Do you have any questions about creating a Mailgun Account and setting it up in Ghost? We have answers to some frequently asked questions on the topic.
Is Mailgun free to use?
Mailgun offers both free and paid plans. The free plan comes with limitations, while paid plans provide more features and higher sending limits.
Can I customize the design of my email templates?
Absolutely! Mailgun's template editor allows you to design visually appealing and branded email templates that resonate with your audience.
What if I face issues with email deliverability?
If you encounter problems, ensure your DNS records are correctly configured. Additionally, maintain a consistent sending pattern and avoid sending spam-like content.